ByJohn A
Key Steps for Successful Emergency Water Extraction in Properties
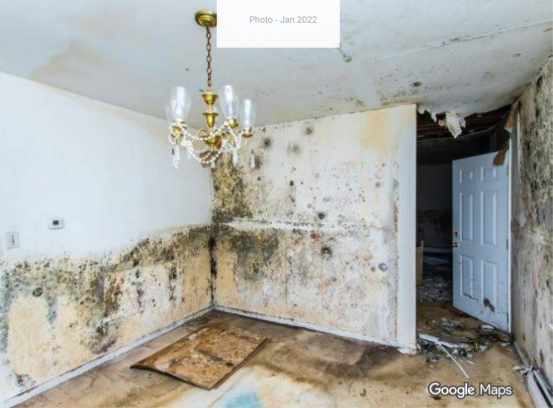
Water damage looks like a floor problem until someone actually digs into it. The visible pooling gets the attention. The wet carpet gets pulled up. The affected room gets aired out. What tends to get missed is what happened underneath the visible layer while everything else was being sorted out. Water moves through porous materials fast. Wicks up drywall. Migrates under flooring. Fills wall cavities the room occupants can’t see. So a quick cleanup that handles the obvious can leave moisture behind in structural framing, insulation, and subfloor. Which becomes mold weeks later. This becomes structural damage months later.
The other point is that properly done water extraction follows a specific sequence. Safety first. Source control second. Categorization third. Physical removal fourth. Then drying, monitoring, and materials assessment. Skip a step, and the whole job downstream gets harder or fails. A homeowner calling for emergency water extraction after discovering standing water is really requesting that the sequence be executed on a compressed timeline. Not just the visible cleanup piece.
Centennial-area homes experience water issues from multiple sources throughout the year. Pipe failures. Appliance leaks. Sump pump failures during snowmelt. Roof leaks after hail. Restoration Logistics Centennial is one of the emergency water extraction providers in the Centennial area, responding to these calls across residential and commercial properties. Nothing here recommends a specific provider. What follows walks through the sequence of steps that actually produce a successful outcome, and why each step matters.
Safety First Before Any Extraction Begins
Standing water and electricity are the first hazards. Ready.gov’s flood safety guidance is direct on this. Turn off the power at the main from a dry location before entering any space with standing water. Structural stability comes next. Sagging ceilings. Buckling floors. Any of that means the space isn’t safe until an engineer or building official has cleared it. Gas leaks. Broken glass underwater. Contaminated water sources. All of it gets checked before anyone starts extraction.
See also: Matching Your Needs to the Right Massage Places Near Me
Identifying and Stopping the Source
Extraction is pointless if the source is still active. A ruptured supply line has to be shut off. The failed appliance has to be isolated. The roof leak has to be patched at least temporarily. Sump pump failures need power restored or emergency pumping. The source assessment usually takes minutes, but skipping it means removing water that keeps coming back, which wastes labor and delays actual drying by hours or days.
Categorizing the Water Before Deploying Equipment
Not all water is treated the same. The IICRC S500 standard classifies water into three categories based on contamination level. Category 1 is clean water from a supply line or water heater. Category 2 carries some contamination. Appliance discharges. Toilet overflow without solids. Category 3 is black water. Sewage. Exterior floodwater. The category drives PPE, drying protocols, and which materials come out versus stay in. A Cat 1 job with the wrong equipment costs money. A Cat 3 job treated like a Cat 1 creates a health hazard.
Physical Water Removal With the Right Tools
Extraction moves through equipment tiers based on volume. Truck-mounted extractors handle the highest capacity, pulling water at rates measured in gallons per minute. Portable extractors reach corners the truck lines can’t. Wet vacuums clean up edges. Submersible pumps handle deep standing water in basements or crawlspaces. Household wet vacs don’t produce the extraction rate or suction depth that commercial equipment does. Which is why professional response makes a bigger difference on volume than most homeowners expect walking in.
Moisture Mapping and Finding the Hidden Water
After the visible water is gone, moisture mapping starts. Meters read moisture content in drywall, subfloor, framing, insulation. Multiple points across the affected zone. Thermal imaging locates areas where moisture is trapped behind walls or under flooring but not visible on the surface. The map determines drying equipment placement and identifies materials that need controlled demolition to reach moisture that can’t be dried through intact surfaces. Skipping mapping and just running fans in the visible affected area is one of the most common ways cleanup fails.
The Drying Phase and Humidity Management
Industrial air movers position across the affected space to push high-velocity air across wet surfaces. Commercial dehumidifiers pull moisture out of the ambient air. The Department of Energy’s guidance on moisture control covers the underlying physics. Warm air holds more moisture than cold air. Once air reaches its dew point, the moisture it can’t hold condenses on the first cold surface it encounters. Which is why controlling both temperature and humidity matters during drying. Not just running fans. The equipment ratio, placement, and ambient conditions all get adjusted based on the specific structure and moisture map readings.
Daily Monitoring Across the Full Cycle
Drying isn’t a set-and-forget process. Moisture readings get taken daily. Equipment position gets adjusted based on how different areas are drying. Progress logs get maintained for insurance purposes. Materials at risk of failing to dry get flagged for controlled removal rather than continued drying attempts. Standard residential drying runs 3-5 days. Complex jobs run longer. Ending the drying phase too early leaves residual moisture that supports mold growth after equipment leaves and no one is monitoring anymore.
Materials Assessment and Documentation
Some materials come out. Some stay. Wet carpet with padding usually comes out. Drywall below the water line usually comes out. Insulation almost always comes out if it gets wet. Hardwood floors get evaluated for warping and species-specific drying potential. Semi-porous materials get case-by-case decisions. Everything gets documented. Photos, moisture readings, equipment logs, materials disposition. The documentation matters for insurance claims and for demonstrating that the job followed the standardized protocol from start to finish, which is what separates a successful extraction from one that produces bigger problems later.